
Class videos are a powerful way to give families a better sense of your class while they are deciding what to enroll in. In this article, we cover some best-practices for creating class videos.
The Monologue
A monologue is a good foundation for your class video. This should be you speaking directly to the camera, as if you’re welcoming families into your class. Make sure the audio is clear and for the best visual quality, we recommend recording on a phone (1080p) or a camera rather than a webcam. Phone or camera recordings tend to produce clearer, higher-quality footage that helps create a more polished final video. Below are some best practices we recommend.
Introduction & Credentials – We recommend including a bit about who are you, and why are you qualified to teach the class. Highlight your subject expertise (e.g., “I’ve been a professional musician for 10 years”). This quickly establishes credibility.
Background & Lighting – We recommend you choose a clean, well-lit background that reflects your teaching environment. Avoid filming next to a bed or in highly personal spaces. A simple teaching setup (see photo below) helps families quickly understand your subject area and creates a more polished final video. In the example shown, the background alone clearly communicates the educator’s focus on drawing.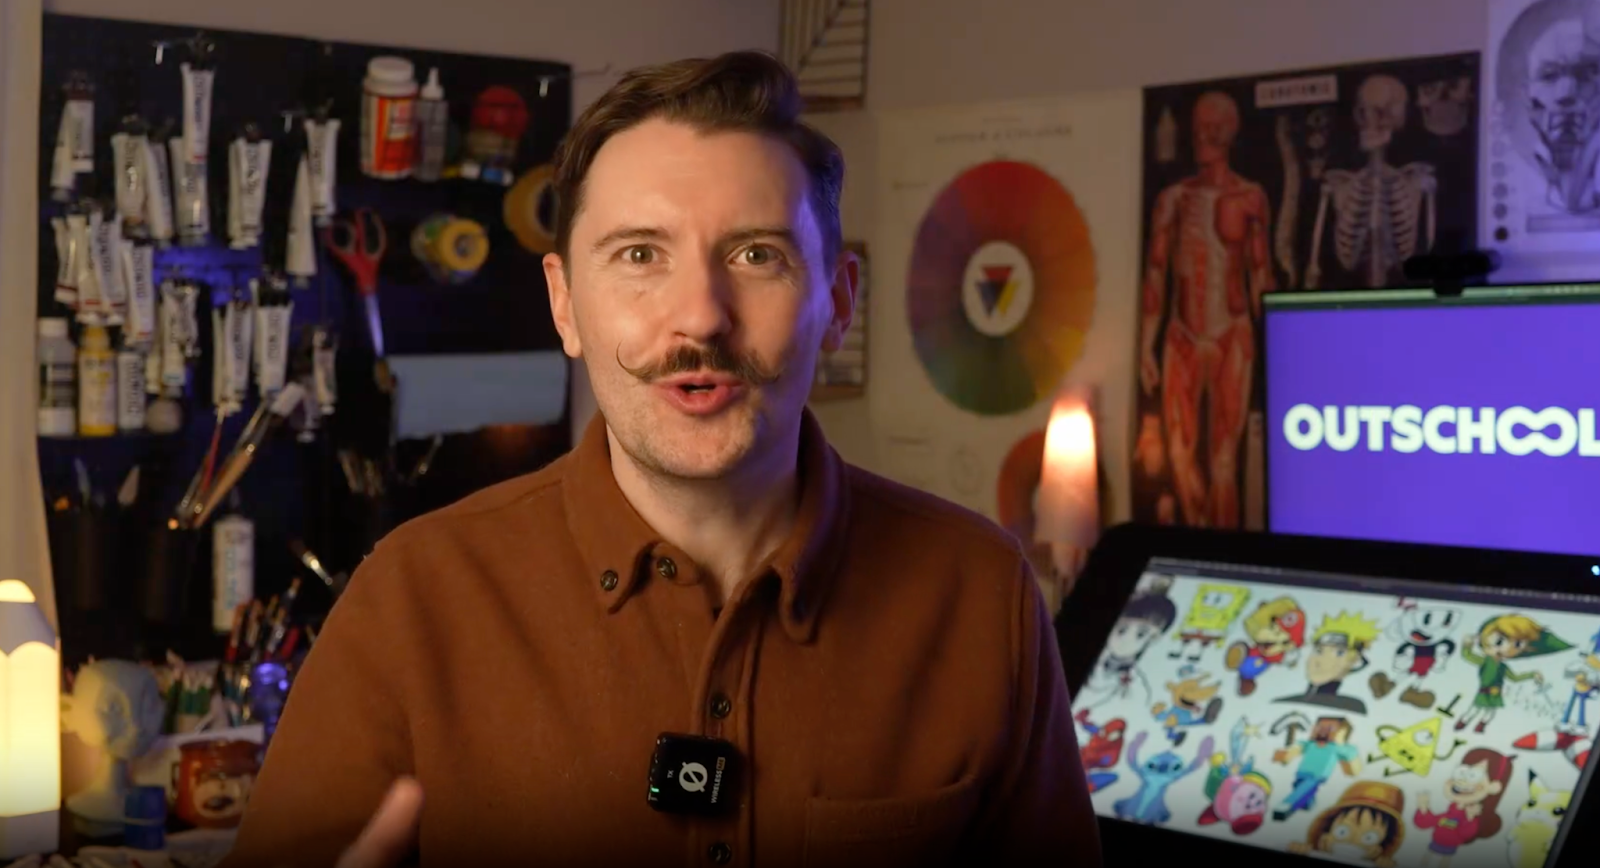
Class Overview & Value – What class are you teaching, and why should students take it? Be specific. Simply saying the class is “fun” is not enough, because there are thousands of fun classes on Outschool. Instead, we recommend explaining what makes your class unique and valuable.
Curriculum Breakdown – Give a quick breakdown of what the students are expected to learn in this class. For example, here is a simplified version of a curriculum for an anime drawing class.
- Week 1: Teaching how to draw the heads
- Week 2: Teaching how to draw the upper bodies
- Week 3: Teaching how to draw the lower body and the feet
- Week 4: Teaching how to draw the movements of the figure
Teaching Footage
Additional footage beyond the monologue can help you better showcase your teaching style. For example, you could include a short clip of yourself teaching in front of your laptop, similar to how you normally teach on Outschool. This does not need to be a live class recording. You can simply teach as if learners are present. Teaching footage could be recorded from the same perspective as the monologue; however, there are also other options that can add interest.
- Option A: Camera at a ~45° angle facing you. This captures both you and what you’re doing on screen or in front of you.


- Option B: High-angle shot from in front of you. This allows us to see both you and your work at the computer.

Work Examples
Footage demonstrating the work learners will do in class or examples of student work are also a good option for adding interest to the monologue. Depending on the nature of the work, you may want to use a top-down shot of your hands at the work surface, a screencast, or static images of example work.
Conclusion
Whatever your style, adding class videos is a great way to up-level your Outschool listings. We hope these best practices are a helpful guide toward effectively communicating your value to families.
